Section intro goes here. Lorem ipsum dolor sit amet, consectetur adipiscing elit. Quisque
finibus condimentum nisl id vulputate. Praesent aliquet varius eros interdum suscipit.
Donec eu purus sed nibh convallis bibendum quis vitae turpis. Duis vestibulum diam
lorem, vitae dapibus nibh facilisis a. Fusce in malesuada odio.
2. User Registration
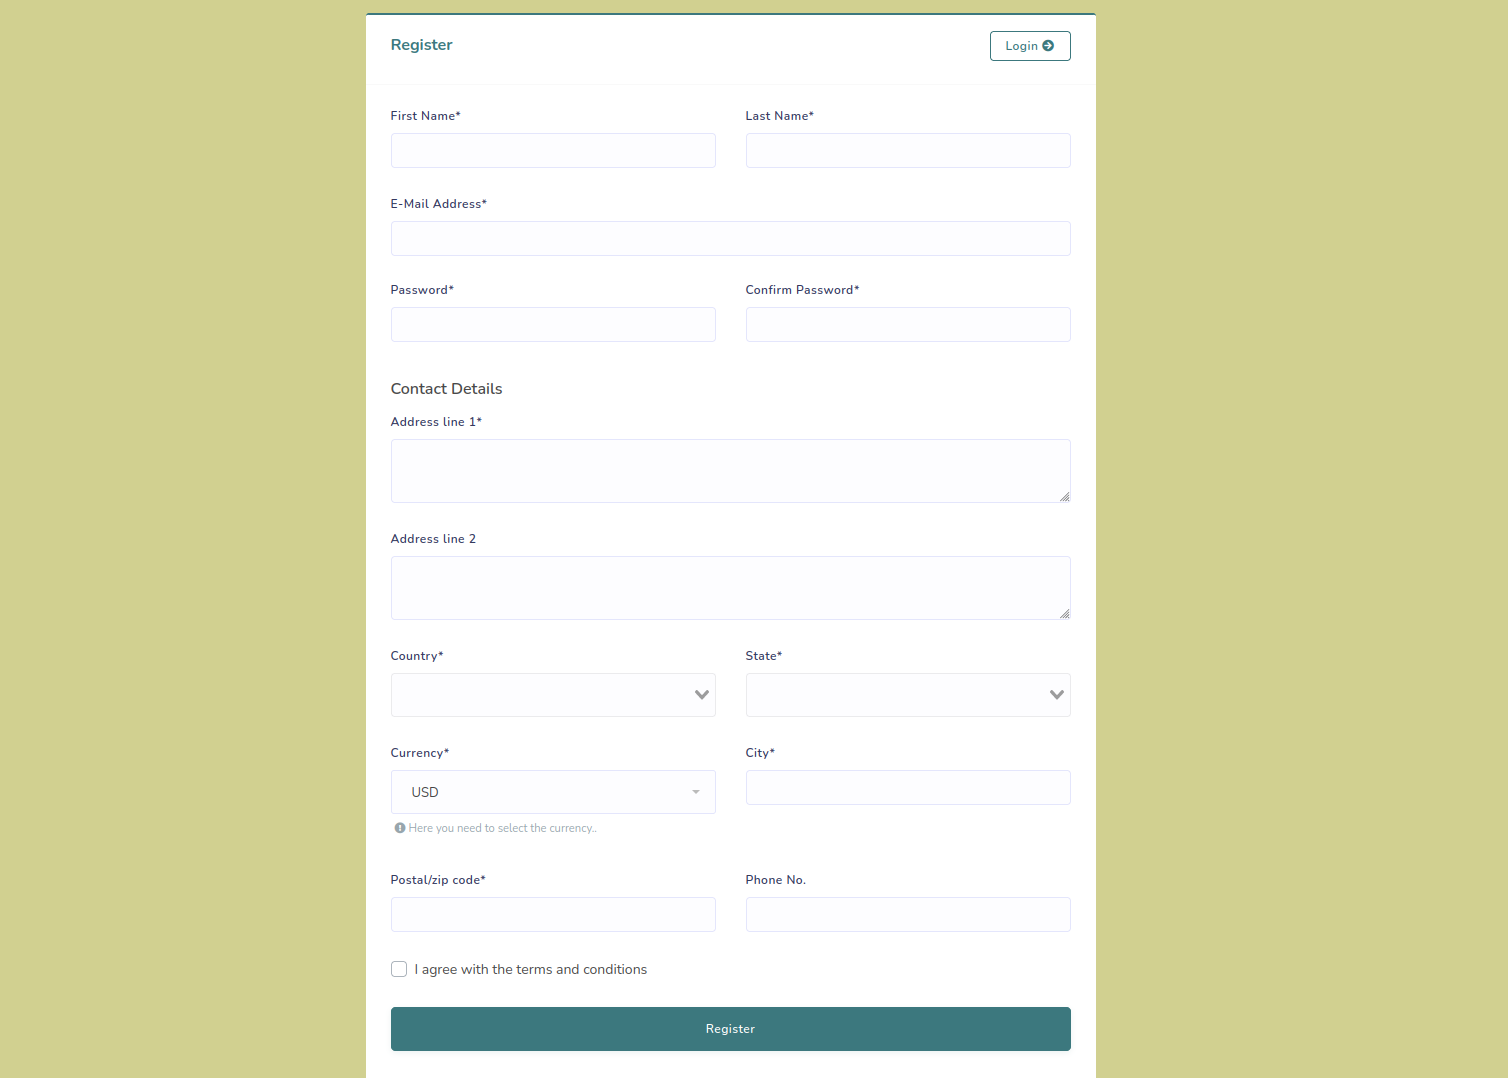
A user have to login to Ticketing Expert to use the system.
A new user should register with Ticketing Expert with their Email, password,
currency and
contact details.
Go to register section on right top corner of the home page to register.
Click on the register button and fill the required fields on the displayed page.
Then press Register.
User registration:
Fig.2.1 User registration
After registration a verification Email will be sent to registered Email address.
User have to verify the Email by clicking on Verify Email Address button.
After the verification the page will be automatically redirected to the dashboard of
Ticketing Expert.
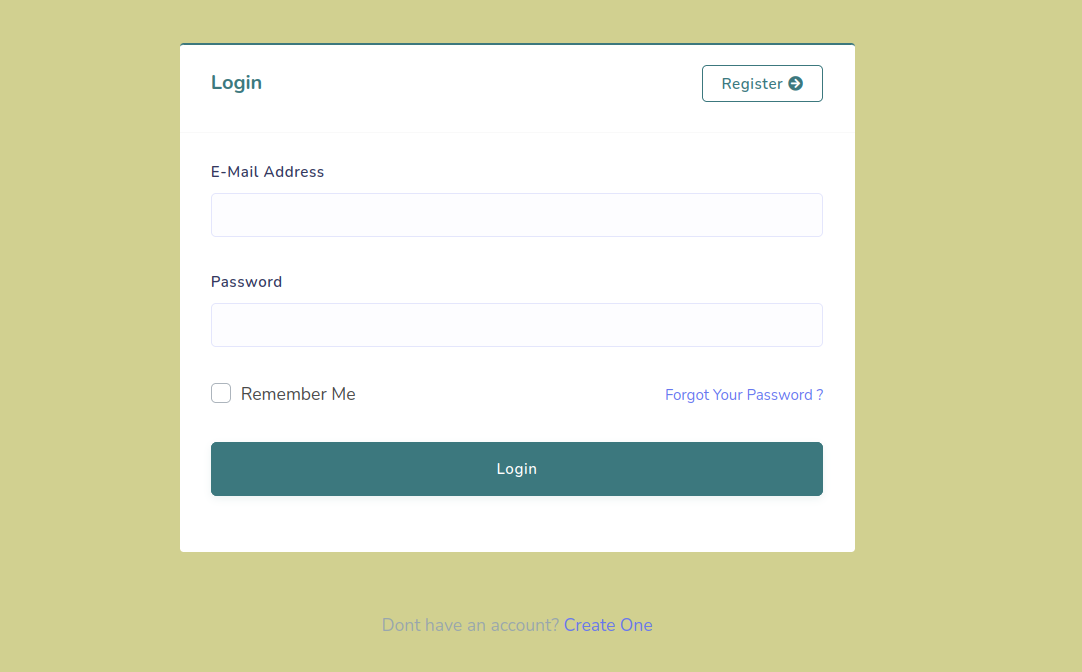
User can re-login to the system with this Email address and password from login
page.
User login:
Fig.2.2 User login
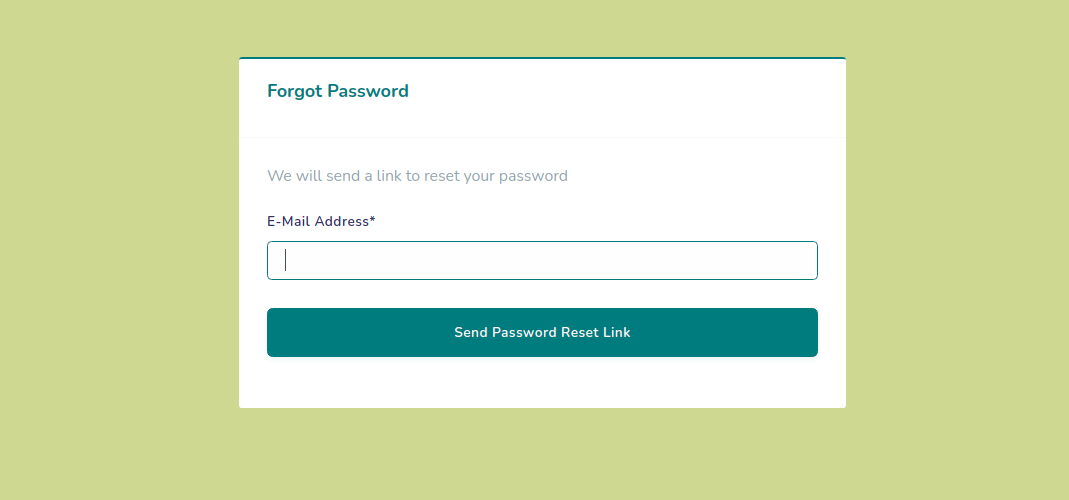
2.1 Reset Password
If anyone want to reset their password or have forgotten the password, they can use the
forgot password link below the login credentials.
After clicking on forgot password link user should provide their registered Email
address for the password reset link.
Password reset link:
Fig.2.3 Password reset link
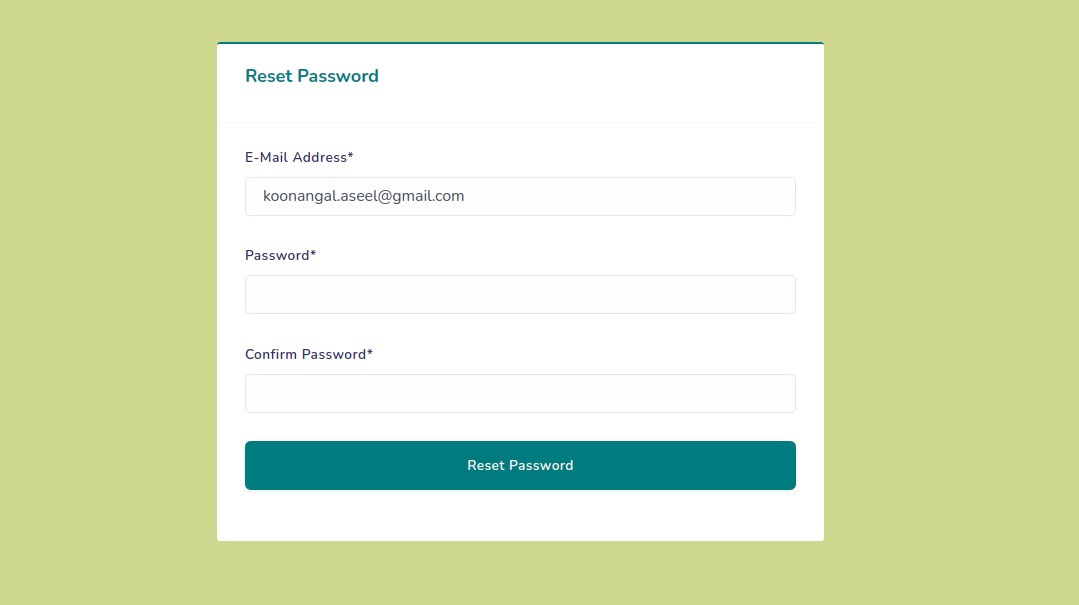
A password reset link will be sent to the registered email address of the user.
User have to open their Email and click on Password reset button.
A page with password reset fields will be opened and user can set their new password.
Reset password:
Fig.2.4 Reset password
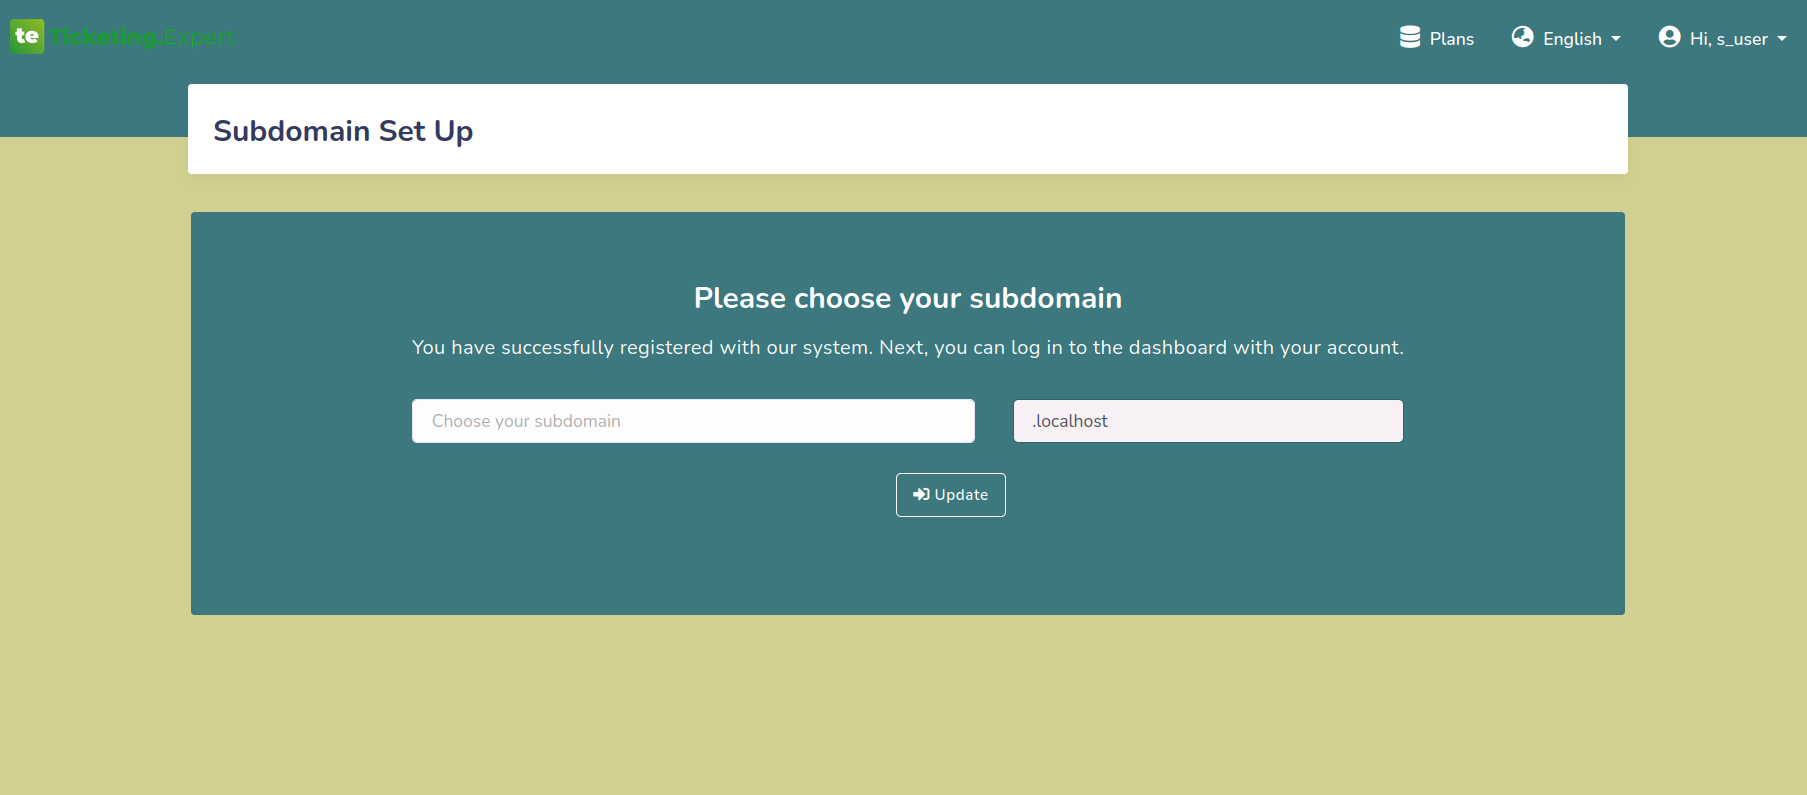
3. Domain Registration
3.1 Domain Selection
After login, the user will be redirected to domain registration page.
Here the user have to enter the domain that they wish to use. Nte that the domain name
should be a simple word that does not contain https://.
If a domain is selected and subscribed, then it can never be changed.
Domain selection:
Fig.3.1 Domain selection
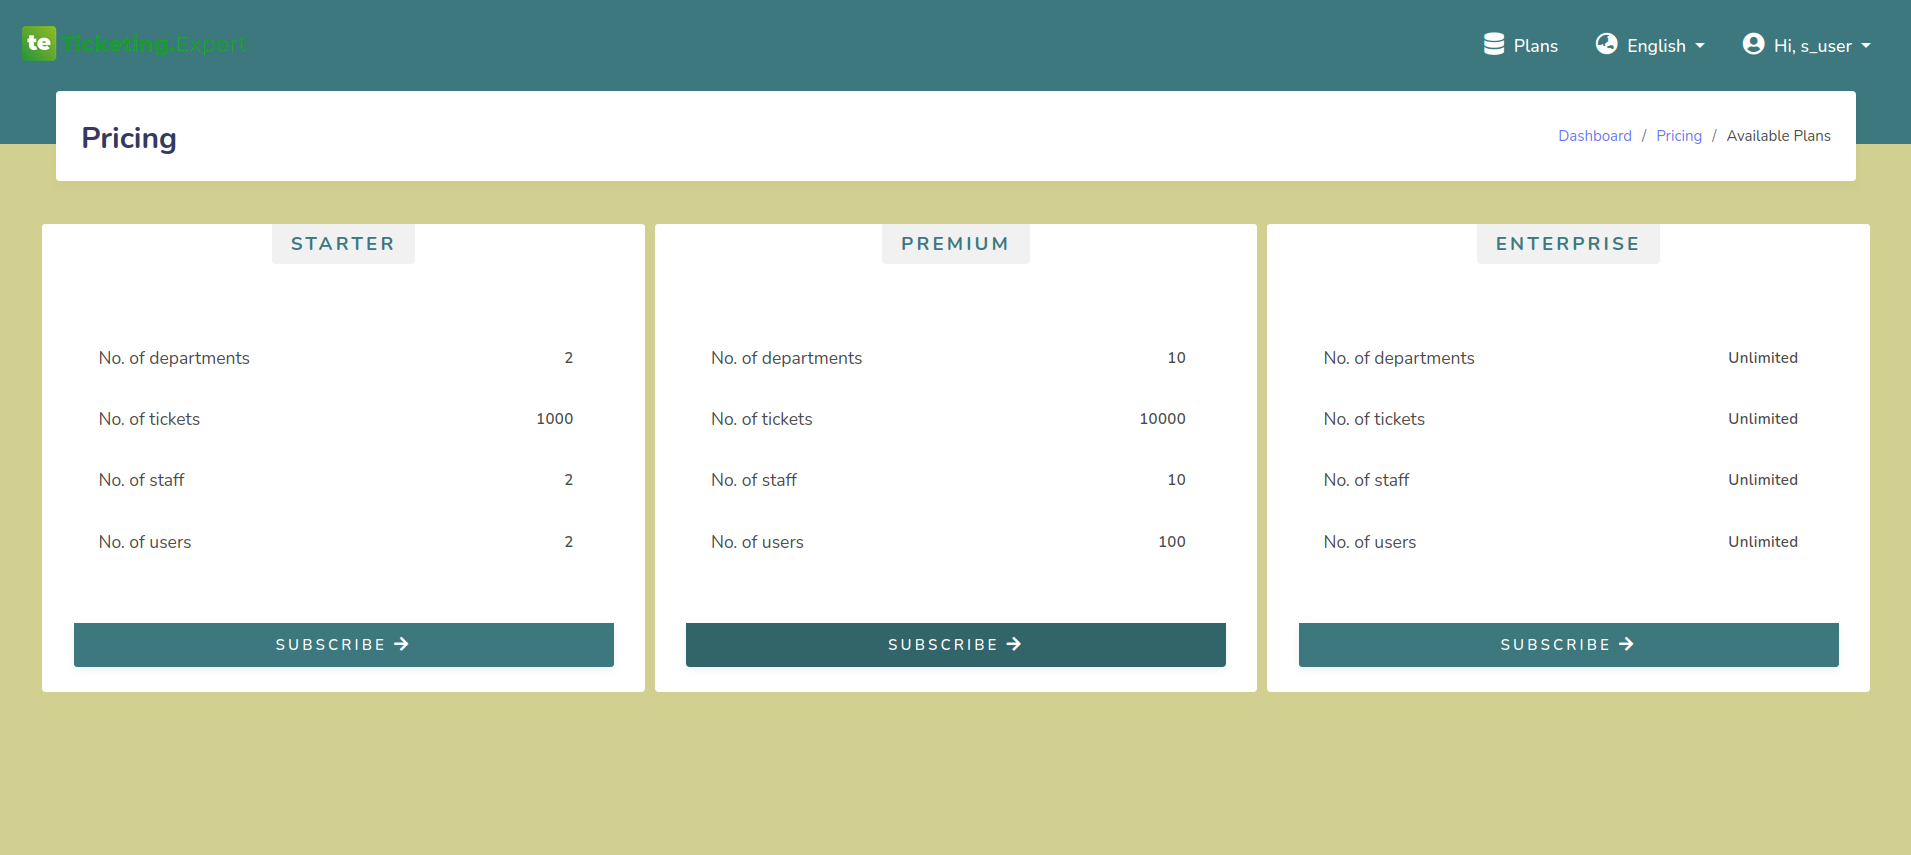
3.2 Add a Subscription
After the selection of domain, the user will be redirected to plan selection page.
The available plans will be listed in the plans section of the user or at the home page
of Monitoring.Zone.
Available Plans:
Fig.3.2 Available Plans
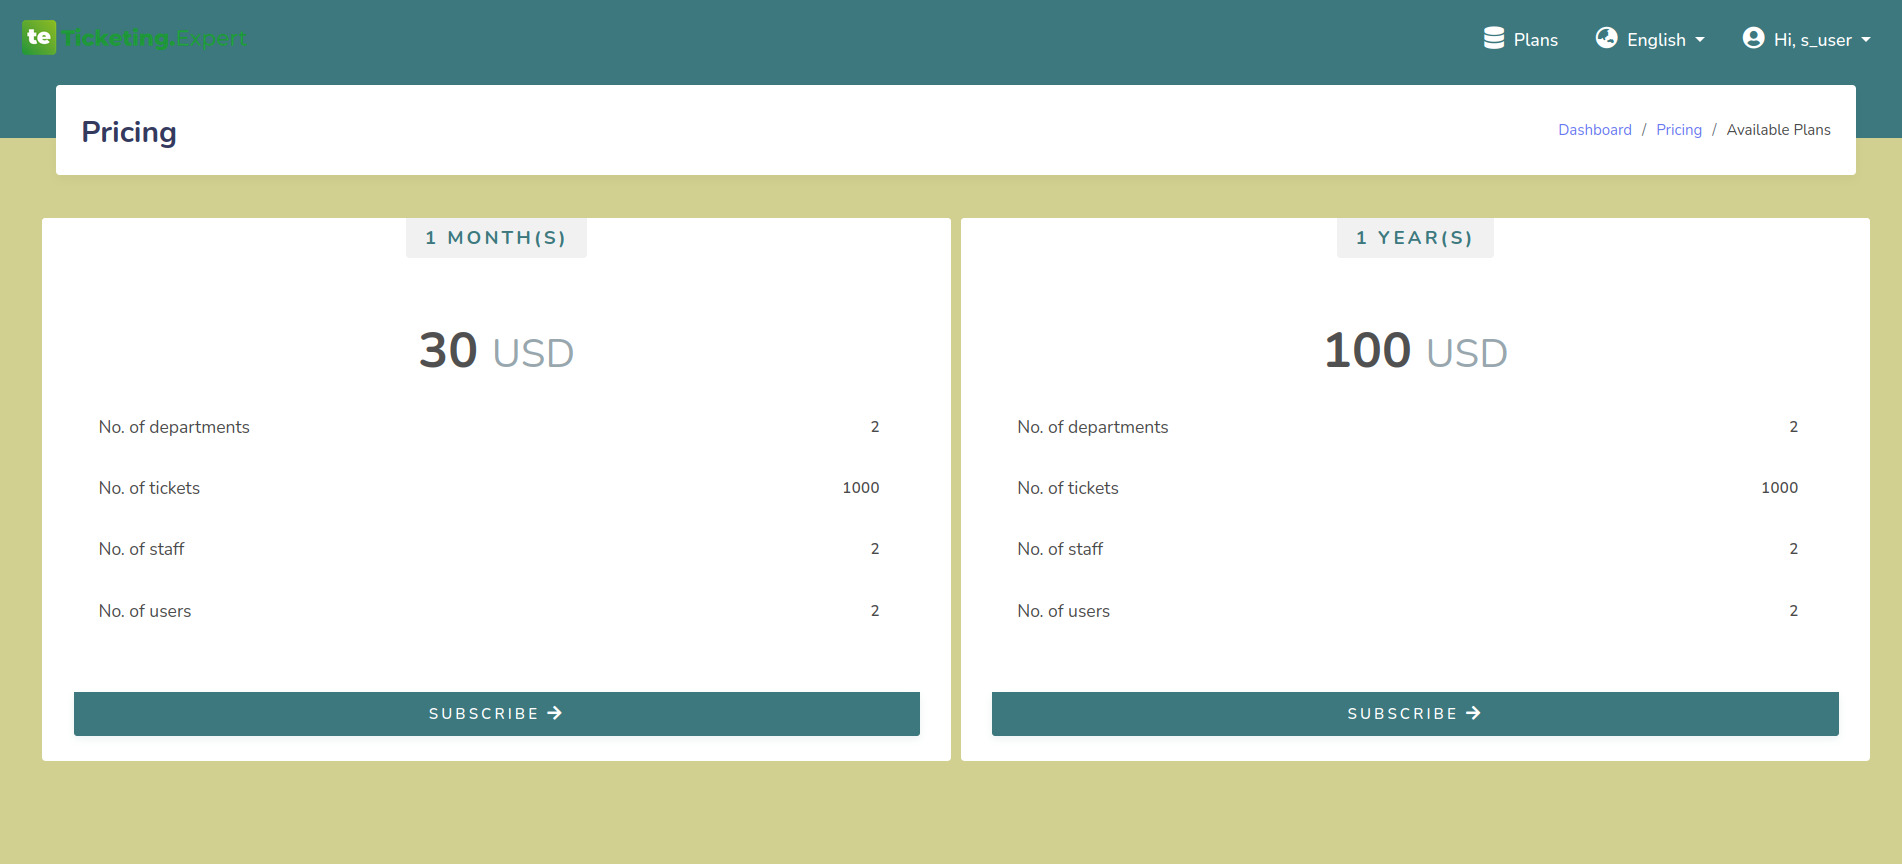
When the subscribe button is pressed, a page with list of pricing details will be
opened.
The pricing will be depended on the currency selected by the user during the
registration.
Pricing details:
Fig.3.3 Pricing Details
User should subscribe to a plan in-order to use the features of Ticketing Expert.
User can see the active plan and expiry dates in the profile section and dashboard
Trial version can be availed for a limited period. User can access all features in trial
subscription.
The trial version can only be used once. If a user subscribed to a paid plan before
using trial version, then the user can't subscribe to the trial version.
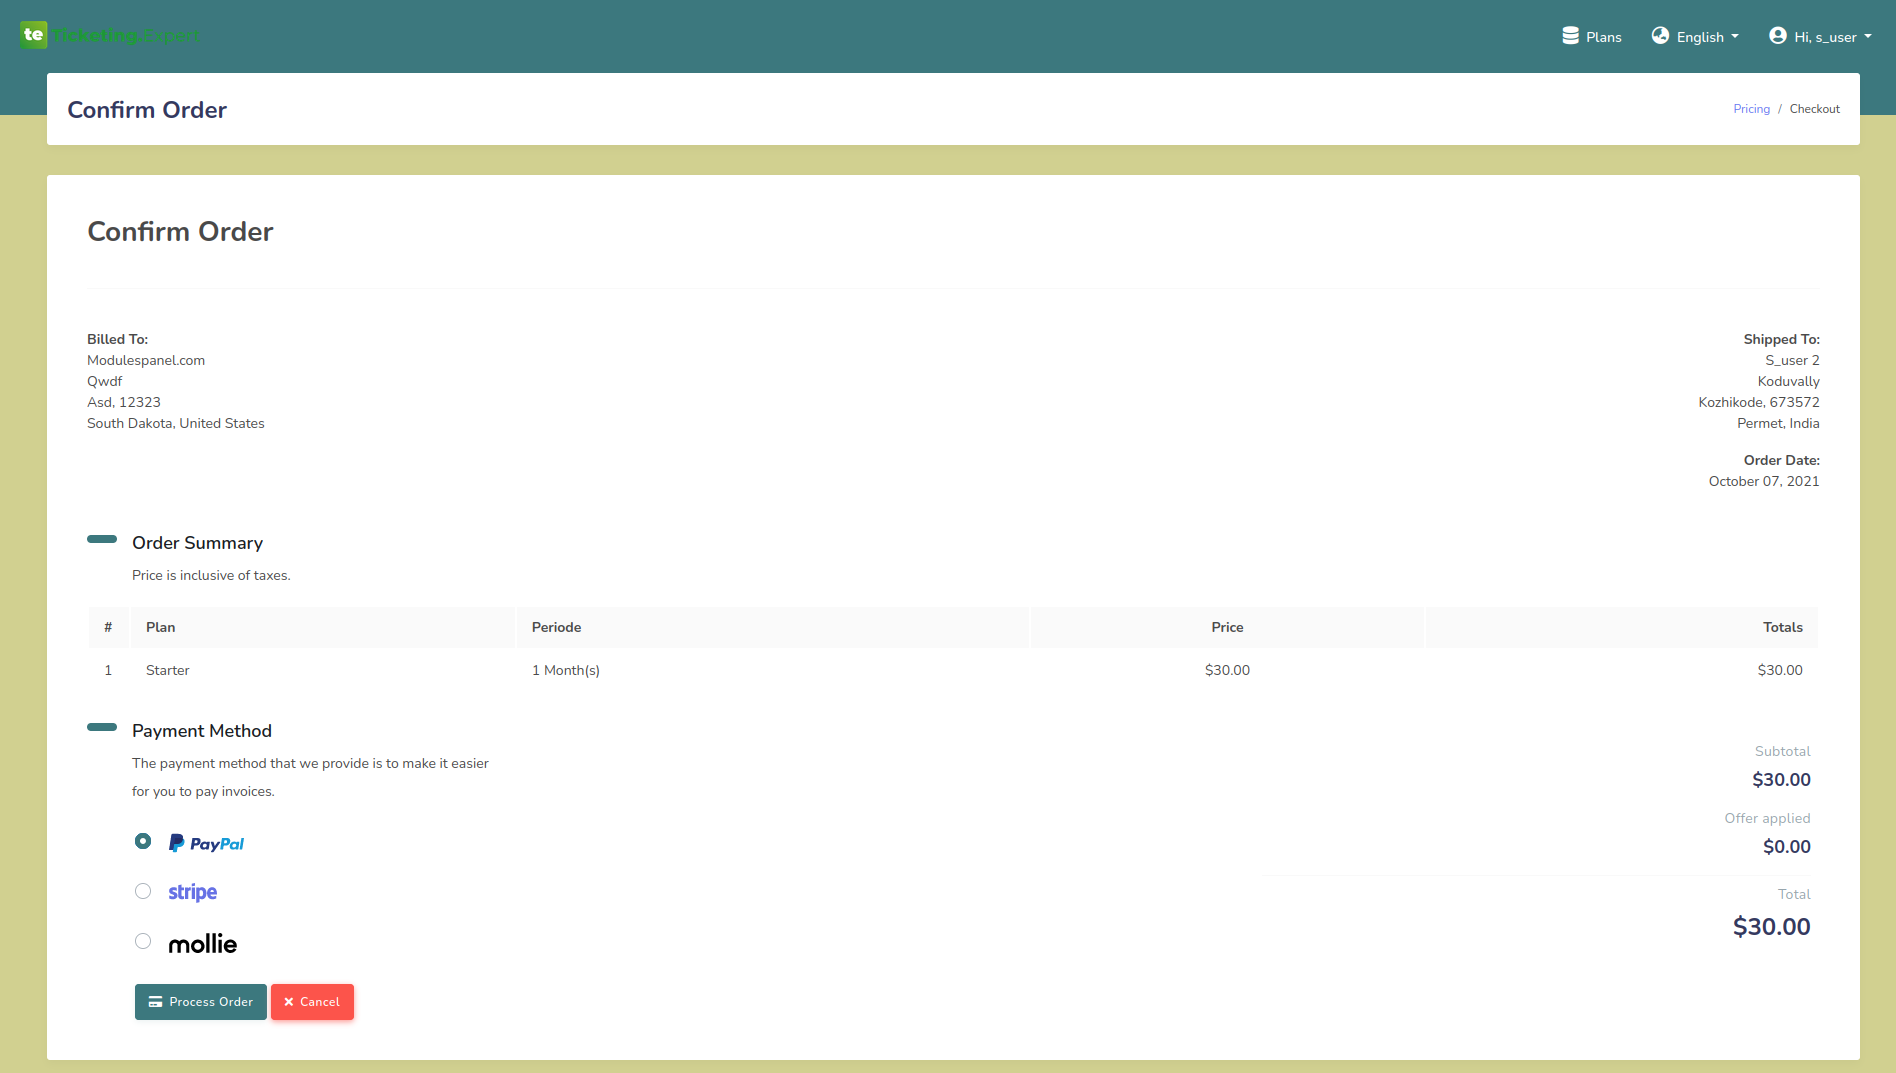
After selecting a plan user will be redirected to the order confirmation page that is
given
below.
Confirm Order:
Fig.3.4 Confirm Order
From this page user can see the invoice details of the plan.
User can use any gateways that is available and click on the confirm order button to
redirect to the checkout page.
Please wait while the transaction is processing. Do not close or go back after the pay
button is pressed.
In the case of any errors, you can contact the customer support team.
Available gateways details are provided in section 3.4.
3.3 Plan Update or Upgrade
User can update or upgrade a plan before or after the current plan is expired.
If the same plan is chose while there is an active subscription is present, the
subscription wil be updated by extending the validity.
If there is an active plan present while a user upgrade the plan to higher version, the
current plan will be removed and will be upgraded with the new plan. At that time the
remaining balance of old plan will be deducted from the new plan price.
Currently we are not providing plan downgrading feature.
3.4 Payment Gateways
Currently we are proving three payment gateways.
Paypal
Stripe
Mollie
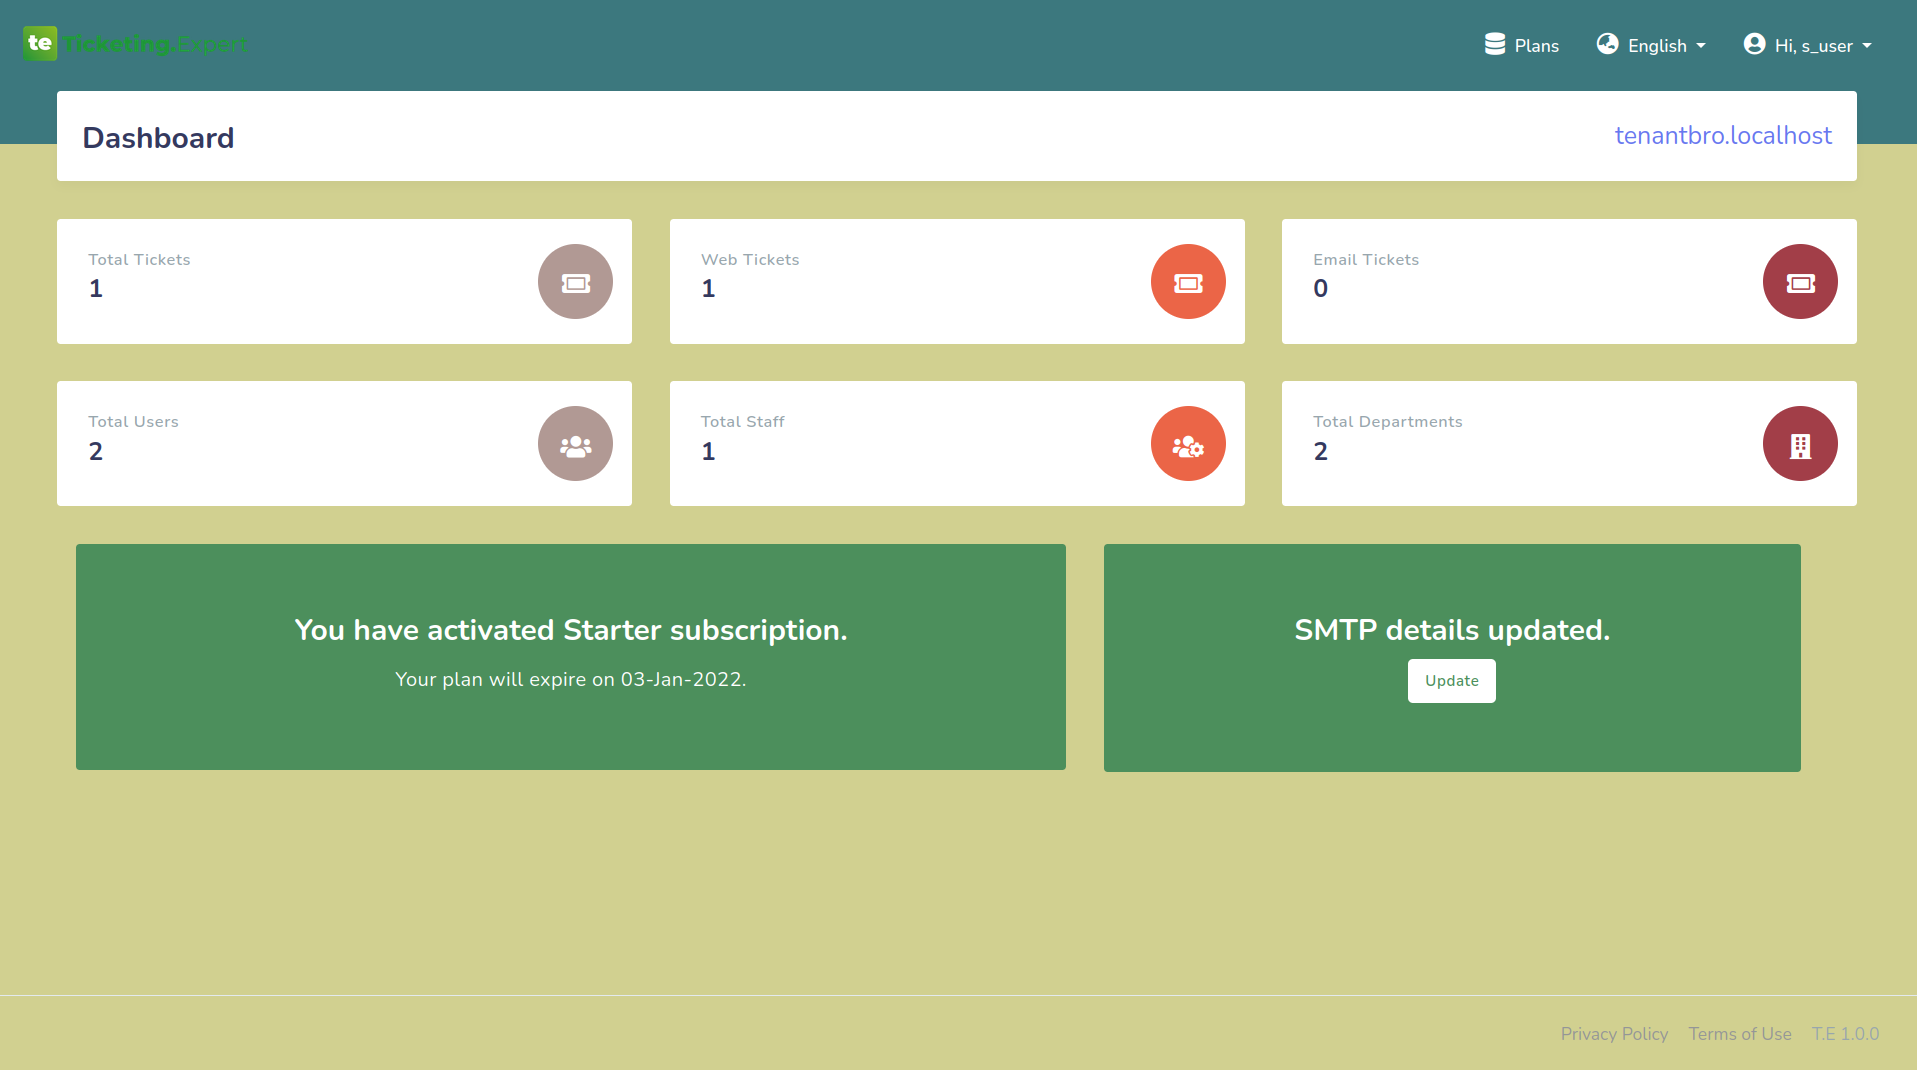
4. Dashboard
Dashboard view:
Fig.4.1 Dashboard
After the subscription, the user will be redirected to the dashboard. The user is
provided with a dashboard which enables them to analyse their ticketing system
and plan details very quickely.
The dashboard will provide the total number of tickets opened to their system
and the total number of staff, users, and departments associated with their
system.
User can also see the active subscription details from dashboard.
If there is an active subscription, the subscription name and the expiry date
will be
shown.
If a user has already purchased a plan and the admin didn't accept, it will be
shown as
a message here.
If the subscription is expired, an expired message will be shown in this
section.
If no subscription is added yet, it will be shown as "You have no subscriptions
yet" and
user can add subscription by clicking the link given along with it.
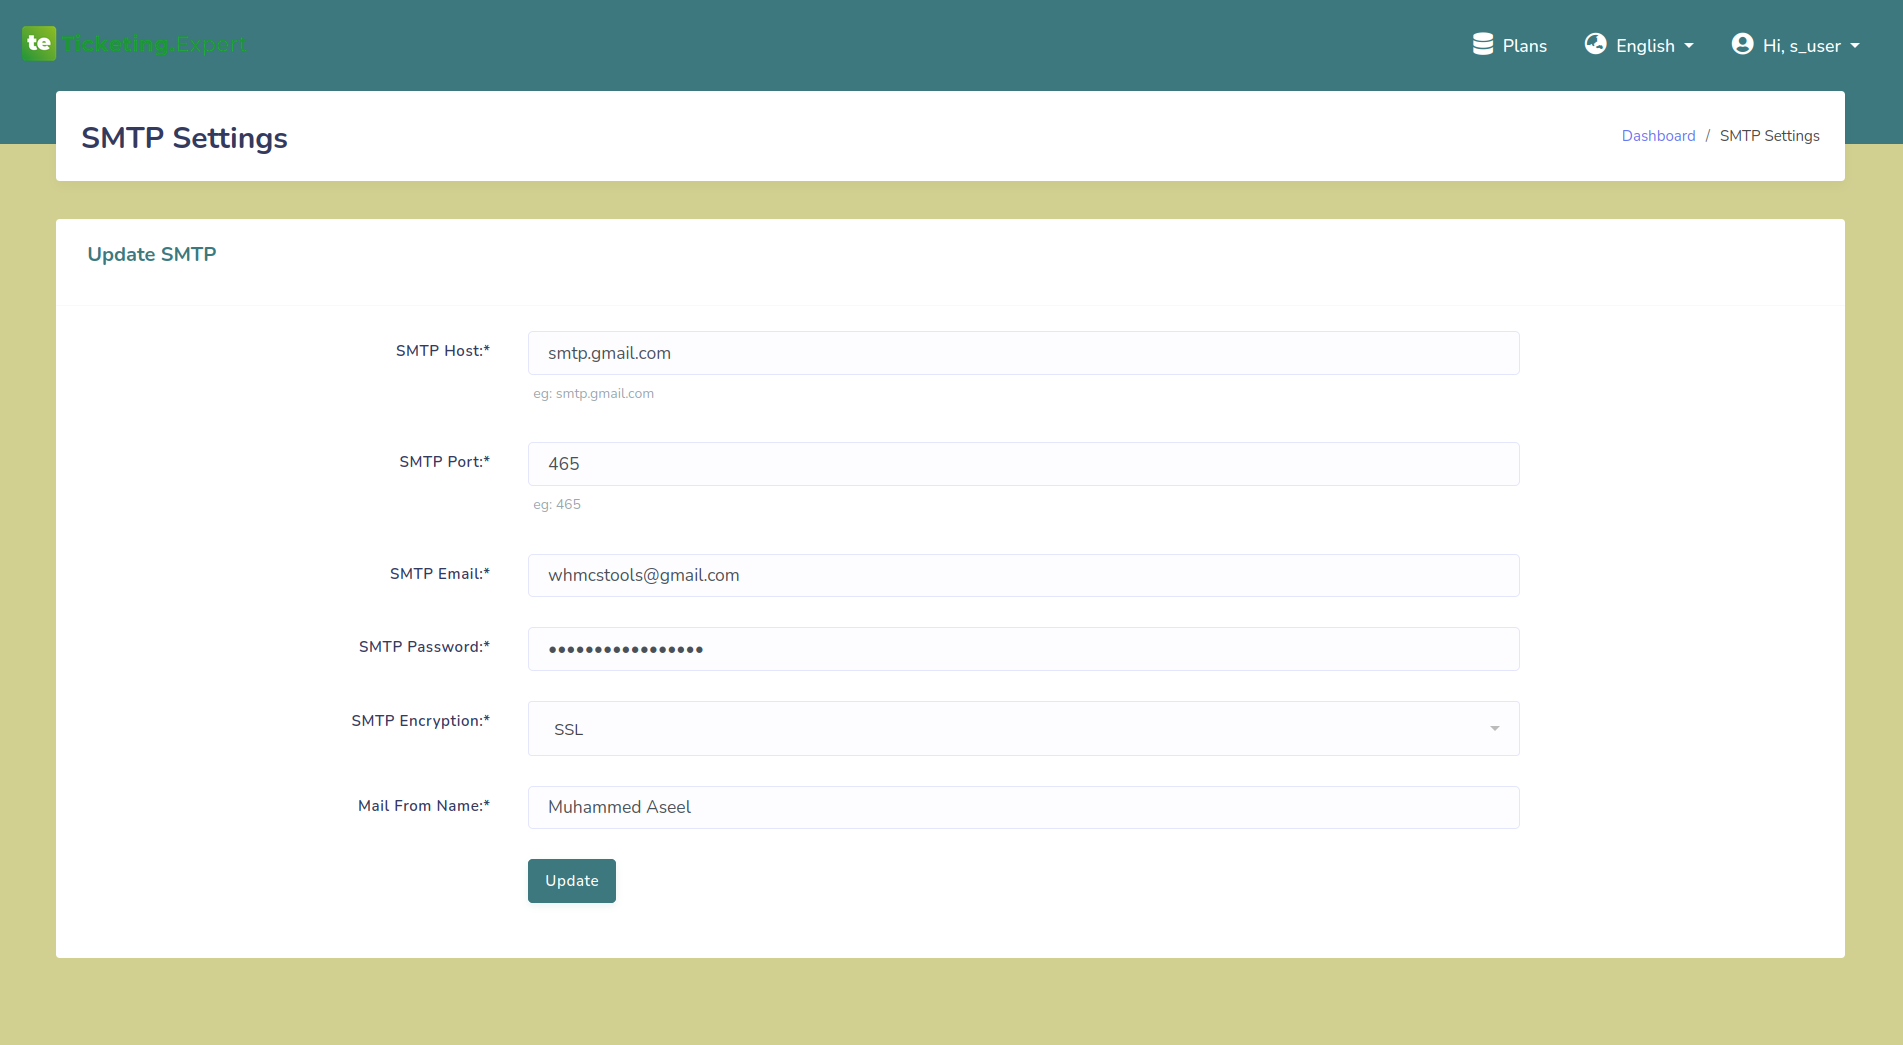
4.1 SMTP Details
User have to provide their SMTP details for sending mails associated with the ticketing
system that they have purchased.
For that, A message and link to update their SMTP details is provided in the bottom of
dashboard.
If the SMTP details are not provided, A message with red box will be shown in the dashboard
saying "SMTP details not updated". Other wise a success message will be shown.
4.1.1 Update SMTP Details
SMTP Details:
Fig.4.2 Add SMTP details
After clicking on SMTP update link, the user will be redirected to a page as shown above.
The user have to provide SMTP host, port, email, password, encryption and a mail from name from this page.
After adding these details, the mails from their purchased system will be send according to these details.
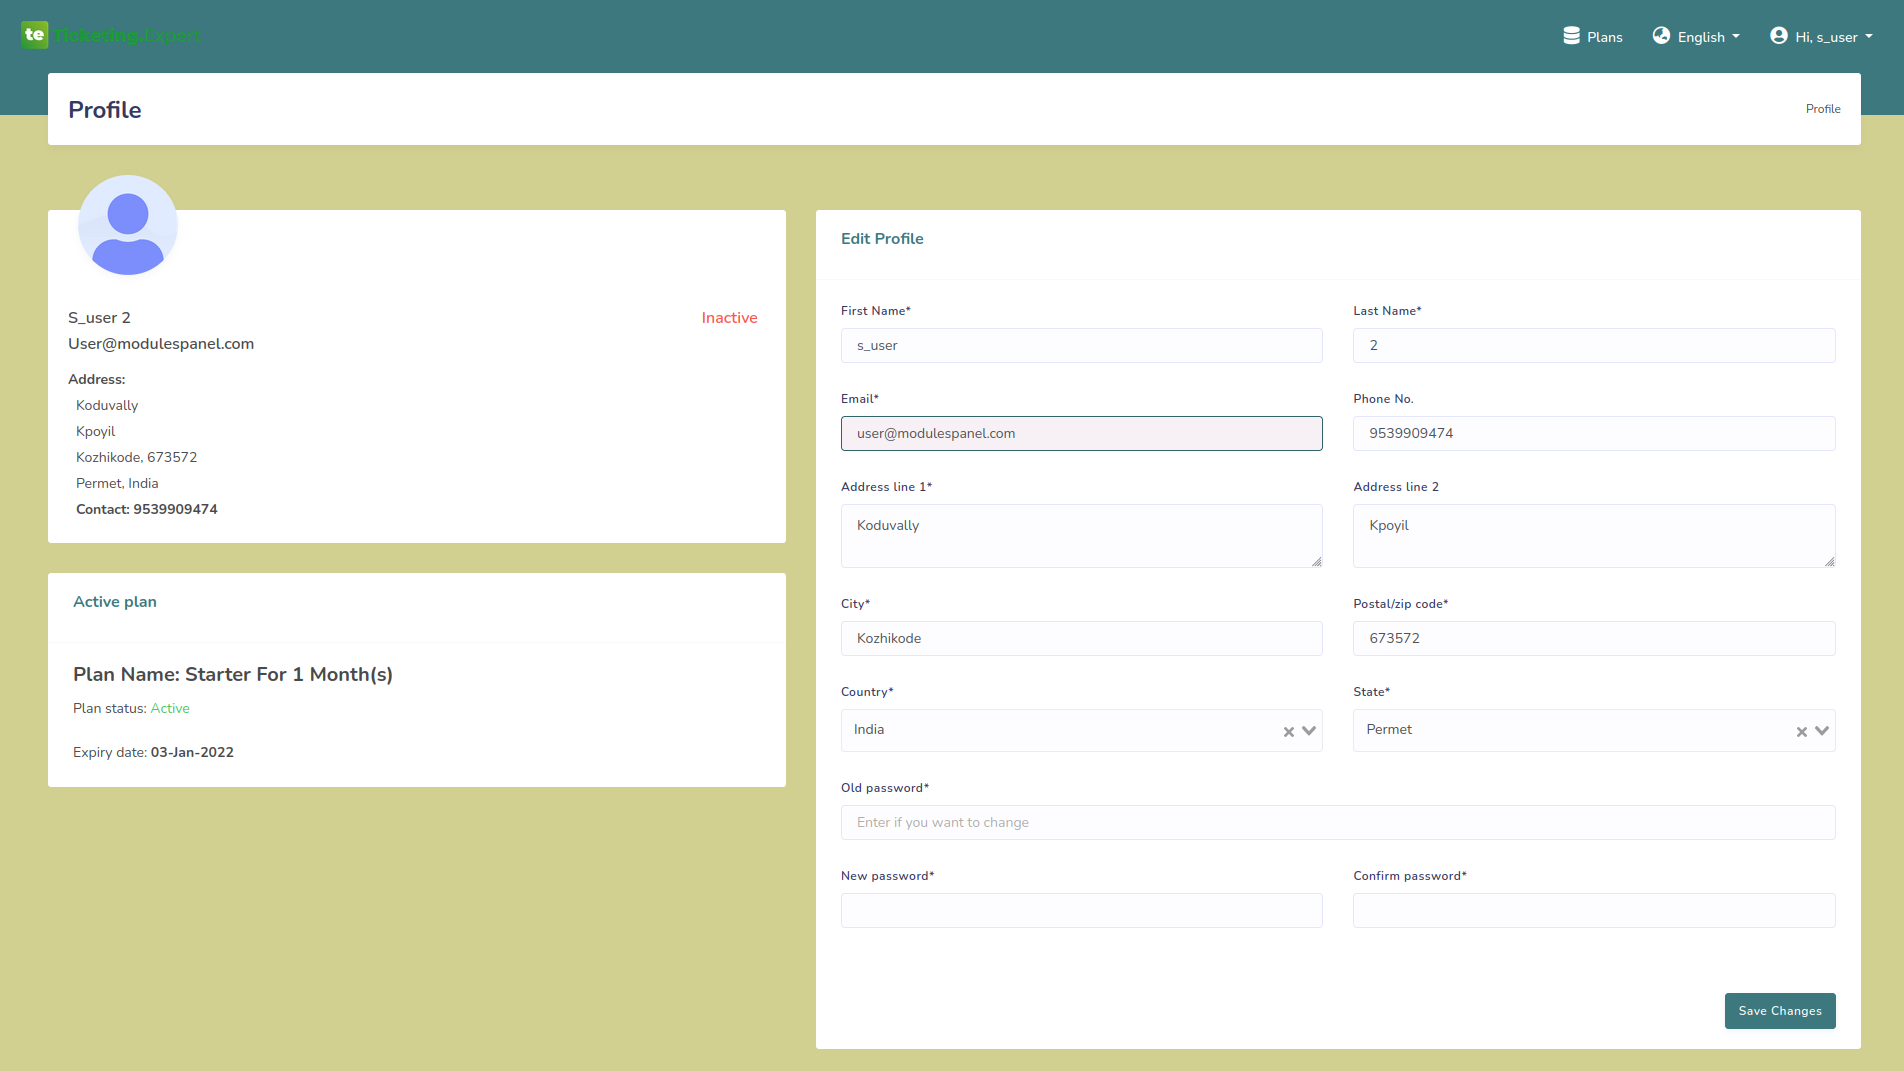
5. Profile
User profile:
Fig.5.1 User profile
User can view or update their profile from the profile section. They can update their
user details, address and login password from there.
Active subscriptions details are also available in the profile section.